Step 2 - Distribute rendering across frames
In this step you create render passes and a Progressive Rendering Viewport 2D node to distribute the rendering of the content of the Car Scene node across several frames.
Distribute rendering among render passes
In this section you create the render passes among which you distribute the rendering of the content of the Car Scene node .
To distribute rendering among render passes:
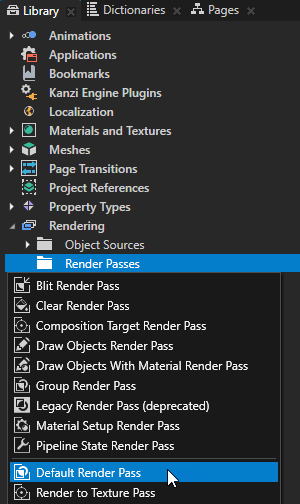
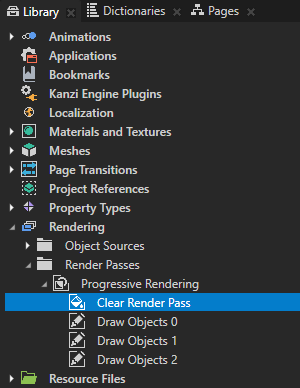
- In the Library > Rendering press Alt and right-click Render Passes, select Default Render Pass, and name it Progressive Rendering.
Default Render Pass creates a basic set of render passes that first render opaque nodes and then transparent nodes.
In the next steps you modify the Progressive Rendering render pass to suit your needs.
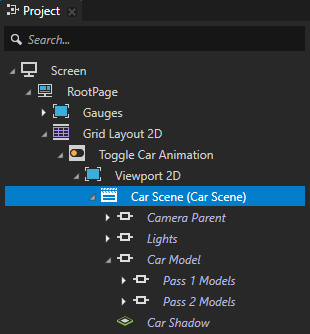
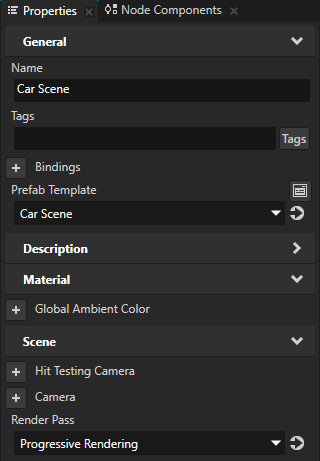
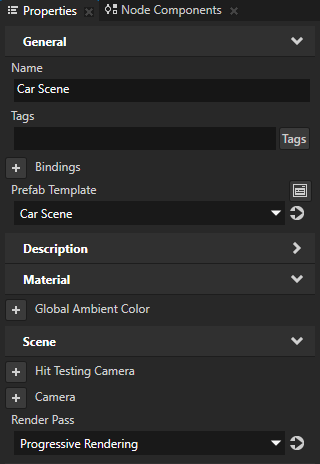
- In the Project select the RootPage > Grid Layout 2D > Toggle Car Animation > Viewport 2D > Car Scene node and in the Properties set the Render Pass property to Progressive Rendering.
This way you set Kanzi to render the Car Scene node using the Progressive Rendering render pass.
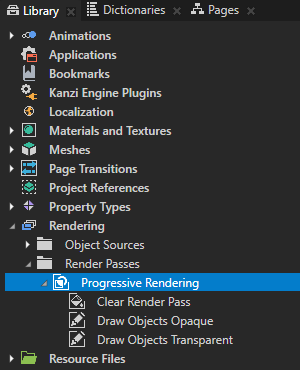
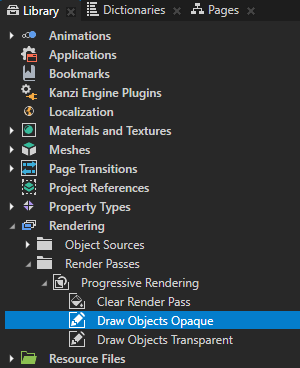
- In the Library > Rendering > Render Passes > Progressive Rendering select the Draw Objects Opaque render pass and in the Properties set:
- Name to Draw Objects Pass 1
- Object Source to Filter Pass 1
You use the Object Source property to tell a Draw Objects Render Pass which nodes you want it to render.
This way you set the Draw Objects Pass 1 render pass to render the Pass 1 Models and Lights nodes collected by the Filter Pass 1 tag filter.
- In the Library > Rendering > Render Passes > Progressive Rendering select the Draw Objects Transparent render pass and in the Properties set:
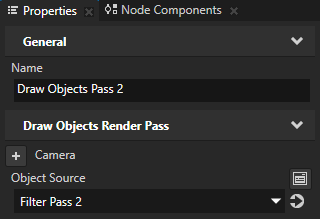
- Name to Draw Objects Pass 2
- Object Source to Filter Pass 2
You set the Draw Objects Pass 2 render pass to render the Pass 2 Models and Lights nodes collected by the Filter Pass 2 tag filter.
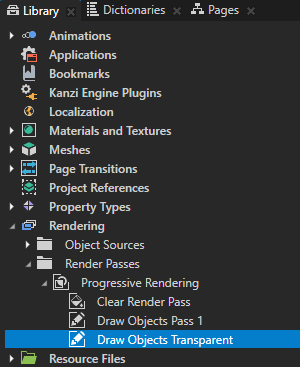

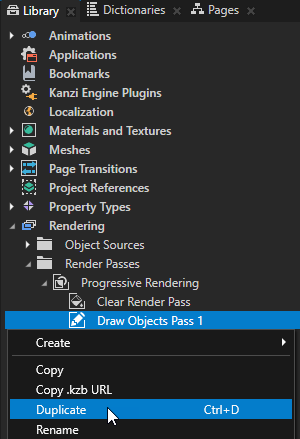
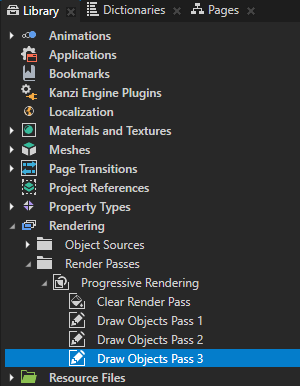
- In the Library > Rendering > Render Passes > Progressive Rendering right-click the Draw Objects Pass 1 render pass, select Duplicate, press the F2 key, and rename it to Draw Objects Pass 3.
You need three Draw Objects Render Pass render passes, one for each pass.
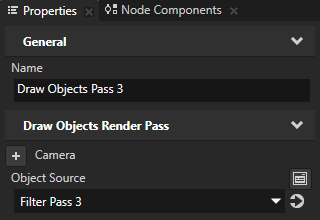
- In the Properties set the Object Source property to Filter Pass 3.
You set the Draw Objects Pass 3 render pass to render the Car Shadow and Lights nodes collected by the Filter Pass 3 tag filter.
Distribute rendering across frames
In this section you create a Progressive Rendering Viewport 2D node to distribute the rendering of the content in the Car Scene node across several frames.
To distribute rendering across frames:
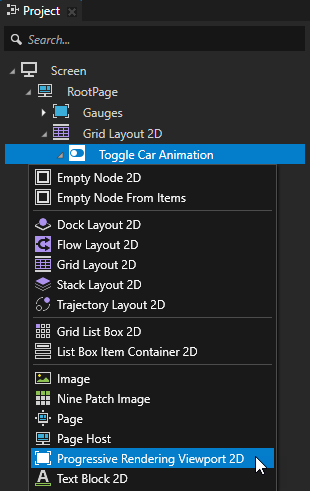
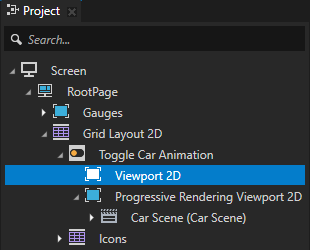
- In the Project press Alt and right-click the Toggle Car Animation node and select Progressive Rendering Viewport 2D.
The Progressive Rendering Viewport 2D node distributes the rendering workload across several frames to reduce the amount of work and time required to render the content in a single frame. Kanzi updates every frame all content not rendered by a Progressive Rendering Viewport 2D node.
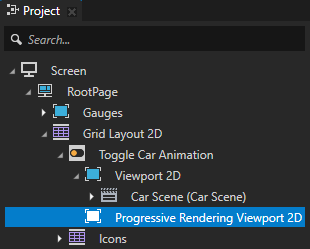
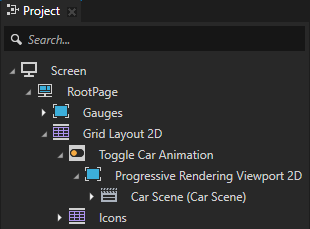
- In the Project drag the Car Scene node from the Viewport 2D node to the Progressive Rendering Viewport 2D node.
The Progressive Rendering Viewport 2D node now uses the Progressive Rendering render pass, because in the previous section you set in the Car Scene node the Render Pass property to the Progressive Rendering render pass.
Kanzi updates all content rendered by a Progressive Rendering Viewport 2D node every n frames, where n is the number of child render passes of the top-level render pass that the Progressive Rendering Viewport 2D node uses.
Because the Progressive Rendering render pass contains one Clear Render Pass and three Draw Objects Render Pass render passes, Kanzi updates the content in the Car Scene node every four frames.

- In the Project select the Viewport 2D node and press the Delete key.
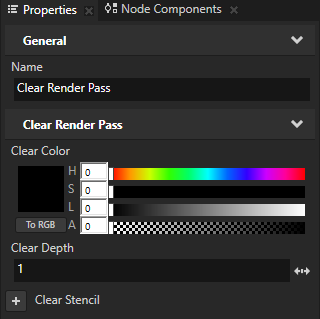
- In the Library > Rendering > Render Passes > Progressive Rendering select the Clear Render Pass, in the Properties add the Clear Color property, and set:
- Lightness (L) to 0
- Alpha (A) to 0
This way you clear the color buffer with transparent black color.
- To take the changes into use in the Preview, in the Preview click Restart.

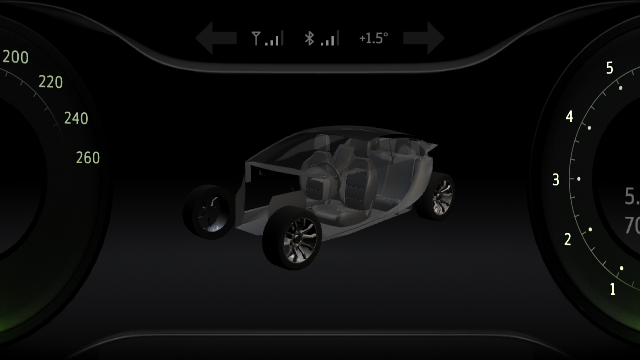
Kanzi now uses the Progressive Rendering Viewport 2D node to update the content in the Car Model node in four frames:
- Clear the color buffer.
- Draw the Pass 1 Models and Lights nodes.
- Draw the Pass 2 Models and Lights nodes.
- Draw the Car Shadow and Lights nodes.
Kanzi updates the content in the Viewport 2D node Gauges every frame.
< PREVIOUS STEP
NEXT STEP >
See also
To learn more about progressive rendering, see Distributing rendering across several frames.
To learn more about the render passes in Kanzi, see Rendering.
To learn more about how you can use filters in your Kanzi application, see Filters.
To learn more about object sources, see Using object sources.

Open topic with navigation